 |
||||||||||||||||||||
|
|
||||||||||||||||||||
| Home | ||||||||||||||||||||
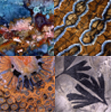

How are our pictures taken?
High magnifications produce problems with loss of depth of field. For example, at a magnification of ten-fold ƒ do not forget total magnification equals magnification in the transparency x magnification produced in the print ƒ depth of field is only 2 or 3 mm. That means that if the plane of the specimen is not exactly parallel to that of the film, part of the image is going to be out of focus. To assure that film and specimen surface are parallel, we have custom designed stages for specimens of different sizes.
For lighting we use multiple fiber optic wands systems. These are lit with halogen tungsten bulbs, the light from which is corrected to daylight with 80A filters. This allows us to see exactly how the light reacts with the specimen under conditions that permit a broad selection of film. We have become very fond of Kodak Ektachrome EPP 100 film which gives clean whites and good color saturation. We do not manipulate color digitally.
Would you like to try your hand at photographing fossil slabs?
- Wet the surface of the specimen with oil or water or submerge the entire specimen in water in a flat glass tray. This does two things. First, it reduces light diffracted by the small irregularities on the polished surface that are exaggerated by magnification. This reduces light lost and significantly enhances color saturation. Second, fluid on the surface of the specimen floats dust particles so that they are out of focus or makes them invisible by providing an environment with nearly the same refractivity.
- To assure that light is well distributed over the specimen, place a small grey card on the top surface of the specimen before wetting it. This will allow you to arrange four fiber optic wands to evenly light the area to be photographed without producing hot or dark spots.
- To avoid or diminish specular reflections produced by small crystals and the like, stand a collar of translucent mylar on top of the area to be photographed. Make this by cutting a 1/2 inch strip with scissors to a suitable length and taping the ends together. If problems persist, judiciously stick small pieces of black electric tape on the mylar collar to selectively reduce light in trouble areas.
- Never assume your film is parallel to your specimen's surface. Use a small round bubble "target level" on your camera back, as well as on the surface of your specimen. Check both before each exposure.
- Occasionally when using a standard lens on fully extended bellows, you may need just that little bit more magnification to enhance detail or isolate your subject. If addition of a small extension ring serves your purpose but produces vignetting, try using a 16 instead of a 12 exposure film cassette. It may crop out your rounded corners.